
13 Creative Upcycling Ideas And Thrift Store Makeovers
Upcycling ideas and thrift store makeovers have become a passionate movement for those who love breathing new life into forgotten treasures.
Second-hand shops overflow with potential waiting to be recognized, and what others see as outdated or worn can become something beautiful with a bit of vision and effort.
The practice connects us to sustainability while allowing creative expression that mass-produced items simply cannot match.
Budget-conscious decorating doesn't mean sacrificing style, and finding unique pieces that tell a story adds character no big-box retailer can replicate.
Learning to see beyond surface scratches and dated finishes opens up a world where you can furnish and decorate spaces in ways that reflect genuine personality.
Every rescued item represents resources saved and landfills spared, making each project both artistically and environmentally rewarding.
Whether you're drawn to furniture restoration, textile revival, or accessory reinvention, the journey of transformation offers satisfaction that goes far beyond the finished result.
Thrift Frames Spring Flower Gallery
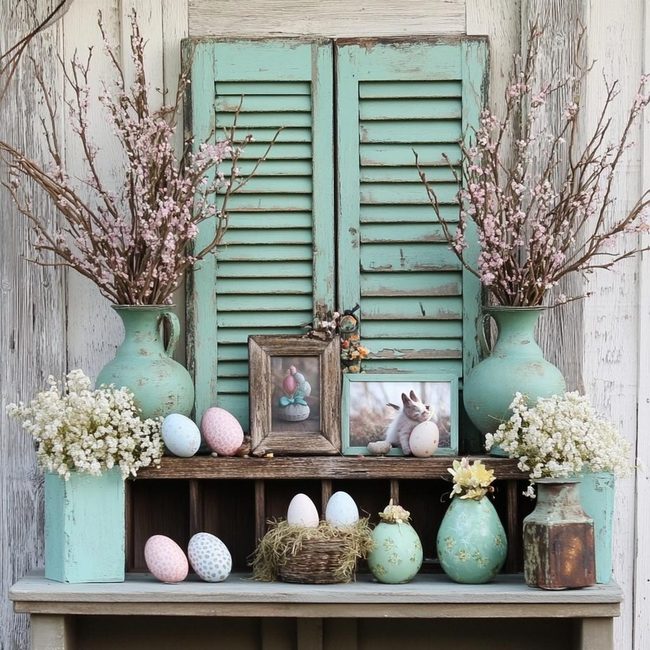
Hunt for old picture frames at thrift stores and yard sales because they make fantastic wall decorations when you repurpose them into spring-inspired art.
Gather frames in different shapes, sizes, and styles, the more mismatched, the better, and don't fret if they look worn or have chipped paint since that vintage character is part of their appeal.
Clean across frame well and remove any old glass, backing, or artwork inside.
You can paint all the frames one unified color like white or understated pastels for a pulled-together look, or leave them in their original finishes if you prefer a more eclectic, bohemian vibe.
One fun way to fill them is pressing spring flowers like daisies, violets, or ferns between heavy book pages for several weeks until they're completely dry and flat.
Once they're ready, arrange your pressed flowers on cardstock or scrapbook paper with clear craft glue, then slip the finished piece into the frame.
Another option involves hunting down vintage postcards, maps, or book pages with spring themes or understated colors at antique shops and flea markets.
Trim these finds to fit your frames and hang them together as a gallery wall for a charming display.
If you have some sewing skills, you can stretch fabric or embroider linen in spring hues across the frame backing and secure it with staples or tape.
Recycled Plastic Bottle Herb Wall
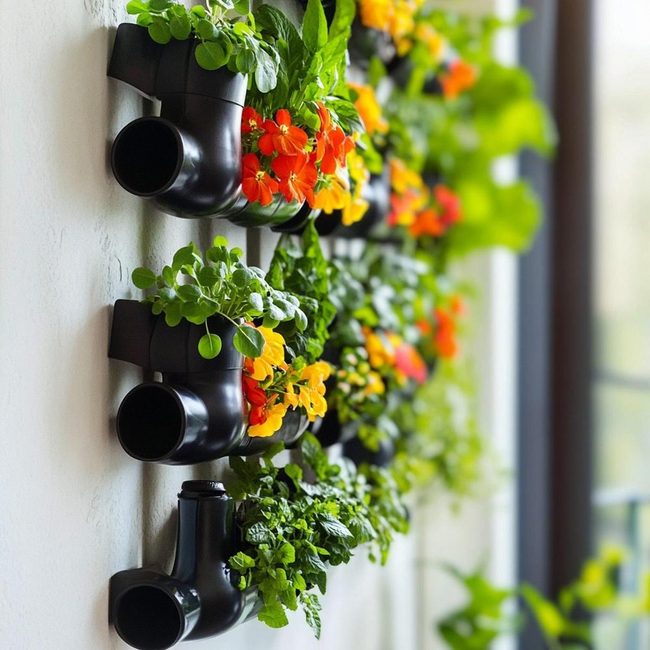
Growing your own herbs at home is easier than you might think, especially when you turn recycled plastic bottles into a living wall garden right in your kitchen or on your patio.
Clear bottles let you watch the soil and roots develop, though green or brown ones add nice color variation if you prefer that look instead.
Cut in all bottle in half lengthwise with a sharp knife, then smooth the rough edges with sandpaper and drill small drainage holes in the bottom so water doesn't pool around your plants.
Hang these planters on a sunny wall or fence using screws, wire, or twine, and arrange them in a staggered pattern that cascades down or line them up in straight rows depending on your style preference.
Fill in all bottle with lightweight potting mix and plant herbs like basil, mint, parsley, cilantro, rosemary, or thyme, making sure you pick varieties that need similar amounts of water and light.
Keep things from getting crowded by giving in all herb enough space to spread, and pinch back growth regularly so your plants stay bushy instead of tall and thin.
Water and feed your herbs on schedule, then harvest them often because using fresh herbs keeps the plants healthy and productive.
For a final personal touch, label in all planter with a handwritten tag, or paint the bottles in delicate pastels and wrap them with colorful tape to match your kitchen décor.
Mason Jars Become Spring Planters
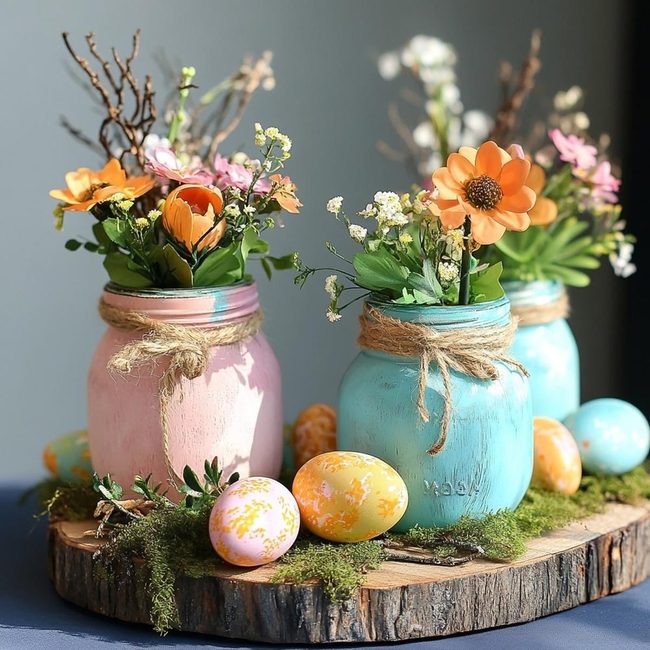
Turning old mason jars into charming planters is one of the easiest upcycling projects you can do, and painted jars in muted pastels look absolutely beautiful with spring blooms or herbs nestled inside.
Start by washing the jars thoroughly with warm soapy water to remove any labels or sticky residue, then let them dry completely before moving forward.
You have plenty of options for customizing them to match your style: wrap them with twine for a rustic feel, use chalk paint or acrylic craft paint for that matte pastel finish, or get creative with decoupage by layering colorful floral paper or fabric scraps across the surface.
Once your decorated jars are ready, fill them with potting soil and add plants that thrive in containers like succulents, small ferns, trailing ivy, or spring flowers such as tulips and daffodils.
Small chalkboard labels tied around the jar necks help you identify what you're growing, and a ribbon or lace accent adds a finishing detail.
These planters work wonderfully on windowsills, dining tables, or shelves throughout your home.
Paper Book Pages Spring Flowers
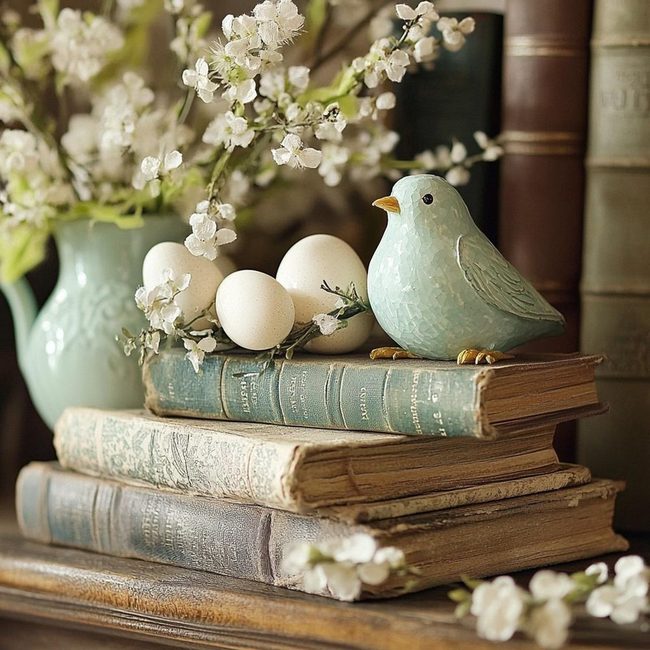
Old books destined for the trash can become impressive paper roses that sit proudly in a vase as your room's centerpiece.
To craft these dimensional flowers, remove the covers and loose pages from a hardcover book, then cut the remaining pages into squares ranging from three inches down to one inch.
Fold across square diagonally twice to form small triangles, then layer them from largest to smallest in a slightly offset pattern so the points spiral outward like rose petals.
A dab of hot glue at the center holds everything together, and gently separating the layers gives you that natural, blooming appearance.
You can also transform book pages into paper butterflies and birds by cutting shapes freehand or with templates, folding them lengthwise, and bending the wings upward for dimension before attaching them to floral wire or fishing line to dangle from branches or wreaths.
For a simpler option, cut pages into long strips and curl them around a pencil, then glue the spirals onto a wreath form and tuck in artificial spring flowers for your front door.
Thrift stores and yard sales offer affordable books in various sizes and colors to match your spring palette, so hunting for treasures costs next to nothing.
Glass Container Mini Yard Displays
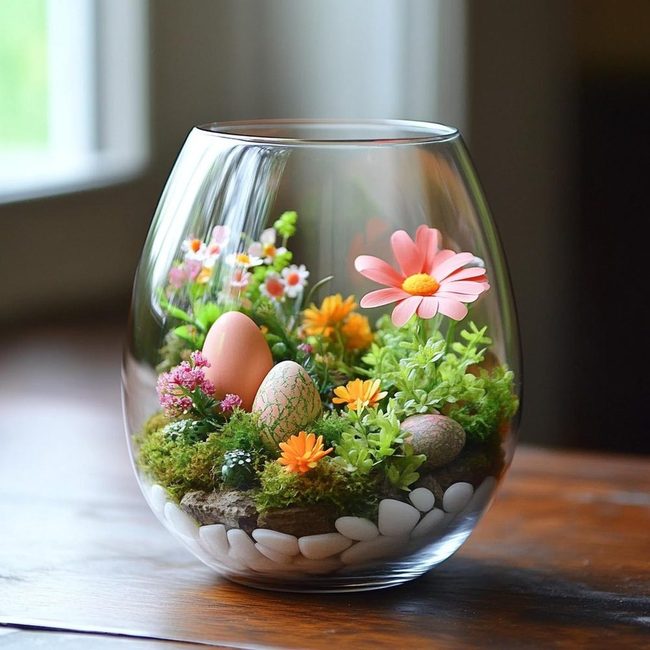
Thrifted glassware shifts into terrariums that bring nature indoors and brighten your spring décor with eye-catching miniature gardens.
You are able to find countless options at thrift stores, classic fishbowls, polished wine glasses, quirky cookie jars, every one ready to hold a unique plant collection.
Before you start, gather clear glass containers with openings large enough for planting, small rocks or pebbles for drainage, activated charcoal to filter soil and prevent mold, potting soil made for terrariums or succulents, and a mix of small plants like ferns, mosses, succulents, or air plants.
Optional decorative touches like figurines, crystals, or sea glass add personality to your finished piece.
Clean your glass container thoroughly with warm soapy water and dry it completely, then smooth any cracks, chips, or sharp edges with sandpaper for safety.
Layer 1-2 inches of small rocks or pebbles at the bottom to allow water to drain away from roots and prevent rot or disease.
Add a thin layer of activated charcoal on top to keep your terrarium fresh and mold-free.
Fill your container halfway with high-quality potting mix designed for terrariums or succulents, and use your fingers or a small spoon to shape gentle contours in the soil.
Painted Wooden Chair Flower Planters
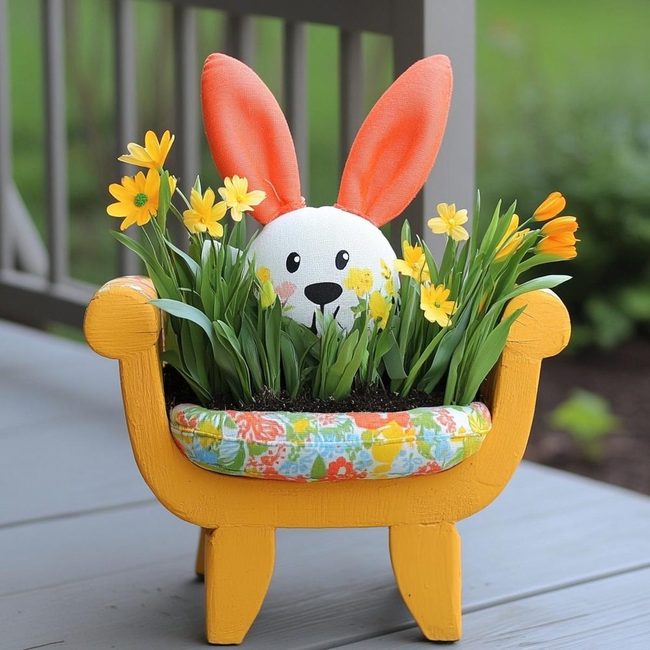
Repurposing old wooden chairs into porch planters gives you a striking way to display flowers and plants while breathing new life into furniture that might otherwise end up in the trash.
Start by selecting a chair with a sturdy frame and a seat that lifts off easily, then check for wobbly joints or loose parts that need reinforcement with wood glue or screws before you begin.
Remove the seat by unscrewing it or thoughtfully prying it away if it's nailed or glued down, then clean the entire chair frame with a damp cloth or pressure washer to eliminate dirt and dust.
Sand the wood with medium-grit sandpaper if it looks worn or faded, smoothing out rough spots and preparing the surface for paint.
Choosing your paint color is where you can have real fun, sunlit shades like turquoise or fuchsia make bold statements, while gentler tones like sage green or gentle yellow blend nicely with most garden spaces, and applying several thin coats of high-quality exterior paint will give you the best results.
While the paint dries, prepare a wooden planter box by either buying one pre-made or building your own from hardware store supplies, making sure to measure the seat opening and drill drainage holes in the bottom.
Understated Pastels Refresh Old Furniture
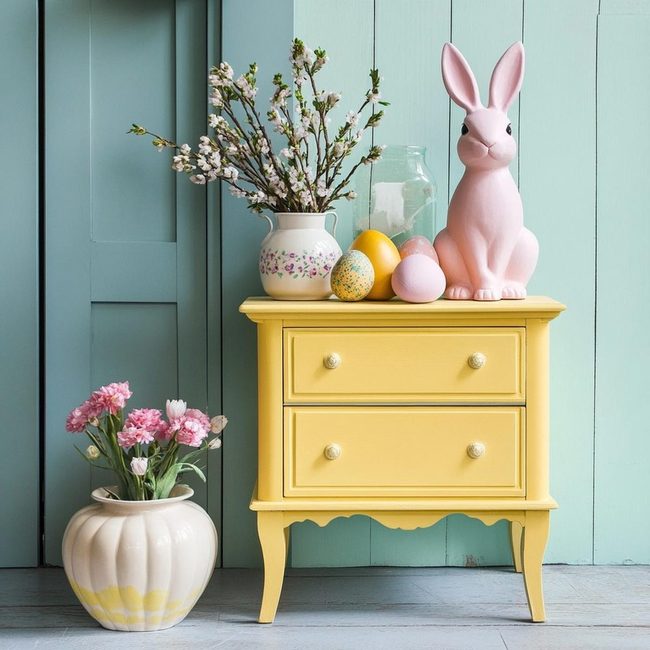
When old furniture has lost its shine, you don't have to throw it away.
A fresh coat of paint and some effort can transform a tired piece into something that looks brand new and works perfectly in your space.
Before you pick up a brush, check whether the piece is sturdy or needs repairs like tightening loose joints or replacing missing hardware.
Get the furniture clean by wiping away all dirt and dust, and if it's really grimy, use a degreaser to cut through stubborn buildup.
Light sanding roughs up the surface so paint sticks better, and liquid deglosser works great on pieces with lots of finishing touches that are hard to reach.
Choosing your paint color is the exciting part, and understated pastels like mint green or pale pink bring a fresh feel, while creamy white or light gray gives you a neutral base that pairs well with almost anything.
Apply paint in thin, even layers with a quality brush or roller, letting across coat dry fully before adding another, and sand gently between coats with fine-grit paper for that smooth, polished look.
For extra personality, use a stencil to add floral or geometric patterns, or try distressing by sanding the edges and corners to show a hint of the original color underneath for a charming shabby-chic or farmhouse style.
Vintage Muffin Tin Succulent Landscape
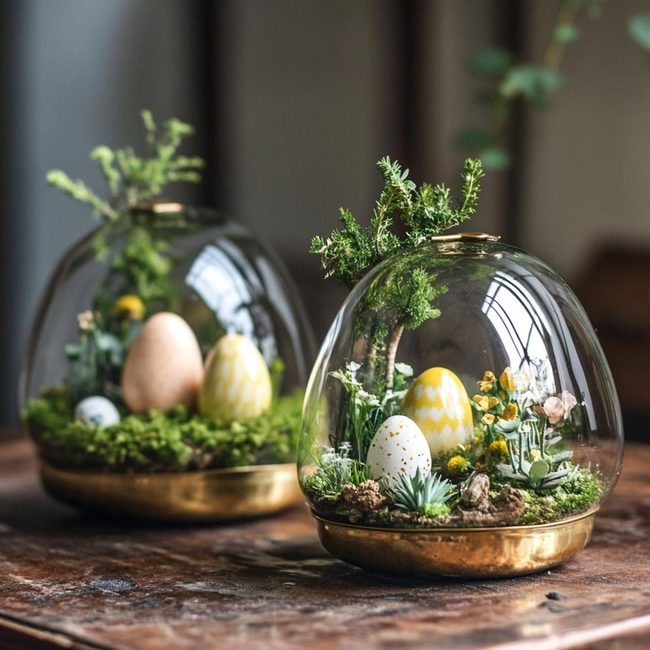
Stop by your local thrift store or flea market and grab a vintage muffin tin, these old kitchen pieces transform into eye-catching spring centerpieces that catch everyone's attention right away.
Start by cleaning your tin thoroughly with warm soapy water and a muted brush to remove rust and grime, then consider giving it a quick spray paint in pale green, muted yellow, or creamy white if it needs freshening up.
You have several fun direction to take this project: fill the cups with small succulents and cacti layered over pebbles and potting mix for a mini garden, arrange colorful dyed eggs or plastic eggs nestled in Easter grass for holiday charm, or plant small spring flowers like pansies and violas mixed with fragrant herbs like thyme and basil.
For extra personality, tuck in decorative touches such as small figurines, pretty rocks, tiny fairy garden pieces, or spring-themed ornaments throughout the display.
Once your muffin tin is ready, set it on your dining table, coffee table, or kitchen counter as a quirky decoration, or use it as a unique place card holder at your Easter brunch by filling in all cup with a small treat or favor.
If you own multiple vintage tins, stack them together using candlesticks or thread spools between in all layer to add height and let you display even more of your favorite spring plants and seasonal decorations.
Painted Tin Cans Spring Flowers
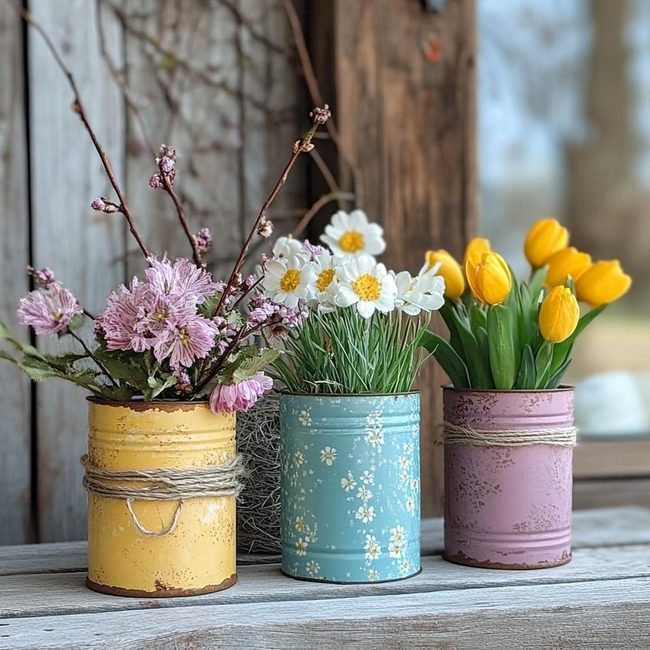
Empty tin cans can transform into gorgeous rustic vases that look far too beautiful to have come from your recycling bin, and the best part is how simple the process really is.
Start by scrubbing away any labels and residue with warm soapy water and a brush, then use sandpaper or a wire brush on stubborn spots while wearing gloves to stay safe from sharp edges.
Once your cans are completely dry, you have the option to spray paint them in muted pastels like mint green or blush pink, or stick with neutral shades such as cream and beige for an understated charm.
Wrapping the cans with twine, burlap, or lace comes next and adds that homespun character we all love, just start at the bottom and work your way up, securing throughout layer with hot glue as you overlap slightly.
You can layer different materials together for extra personality, mixing lace over twine or adding washi tape around the middle of a burlap-wrapped can.
Small decorative elements like buttons, seashells, or dried herbs glued onto the cans bring additional texture and visual interest to match your color scheme.
Finally, fill your vases with spring blooms from your garden or a farmer's market, wildflowers, delicate blossoms, fragrant herbs, or branches all work beautifully arranged with trimmed stems.
Fabric-Filled Hoops Bring Spring Walls
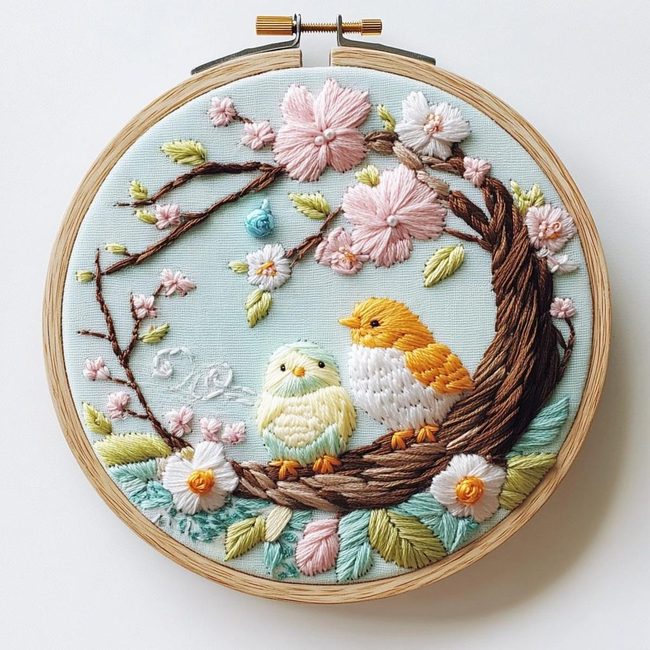
Embroidery hoops make wonderful frames for spring-themed wall art and can transform any blank space into something charming and personal.
Start by gathering hoops in various sizes from craft stores or online, choosing bamboo, plastic, or wood depending on your style and whether you want a matched set or eclectic mix.
Next comes the fun part, selecting what goes inside, and you have so many options to play with: pretty floral fabrics in spring colors, vintage handkerchiefs or tea towels with embroidered , scraps of lace or burlap, pressed flowers and leaves, watercolor paintings, or embroidered designs on linen and canvas.
To assemble your art, separate the inner and outer rings of the hoop, lay your chosen fabric or material centered over the inner ring, then slip the outer ring on top and tighten the screw to hold everything in place.
Pull the fabric gently until it's smooth and wrinkle-free, then trim away any excess from the back with scissors.
If you're using pressed flowers or leaves, arrange them on your fabric first and then protect them with a piece of clear glass or plastic cut to size, which you can find at most craft stores or salvage from old picture frames.
White Felt Bunny Jar Craft
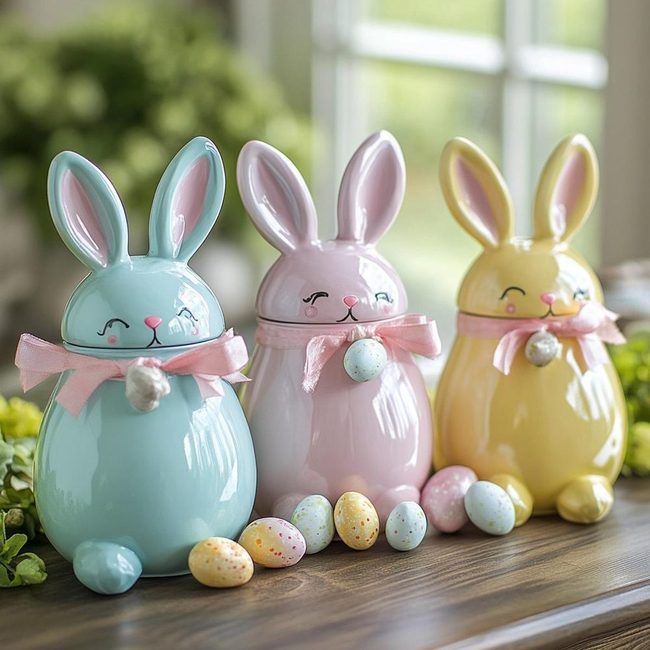
Start your Easter decorating with painted jar lids transformed into bunny heads that sit prominently on display shelves or tables.
Gather clean jars in different sizes, mason jars, baby food containers, or small pickle jars all work great, and wash away any labels and residue with soap and water.
Paint those lids white with acrylic craft paint, applying multiple coats and letting eachdry fully before adding the next layer.
Cut ear shapes from white felt or fabric, making them roughly twice the height of your jar lids, and if you want extra charm, glue smaller pink inner ear pieces to the white ones and attach both to the lid tops using strong craft glue or a hot glue gun so the ears stand straight up.
Draw sweet bunny faces on the front of eachjar with a black permanent marker or small paintbrush dipped in black acrylic paint, simple dots for eyes work well, or you can add white highlights for dimension, a small triangle or "X" for the nose, and thin lines for whiskers.
Wrap ribbon or twine around eachjar's neck in subtle pastels, and add a bow or artificial flower sprig if you'd like more decoration.
Fill your bunny jars with Easter candies like jelly beans or chocolate eggs, small succulents for a spring look, toys, trinkets, or office supplies depending on your needs.
Rainbow Egg Halves Spring Garland

Nothing says spring like transforming those old plastic Easter eggs gathering dust in your closet into a spread of color hanging throughout your home, and we love how this upcycling project turns forgotten materials into something fresh and cheerful.
Start by sorting your eggs by color, you can go all one shade for a minimal look or blend multiple hues together for a rainbow effect that really pops.
Give your eggs a quick wipe with a damp cloth if they look scuffed, then thoughtfully cut them in half lengthwise using sharp scissors or a craft knife, working slowly to keep yourself safe.
String your halves onto whatever material speaks to you, whether that's ribbon, fishing line, embroidery floss, or jute rope, and secure eachpiece with a dab of hot glue as you thread them on.
Mix up your colors and patterns as you go, and feel free to slip in some wooden beads, pom poms, or tiny artificial flowers between the egg pieces for extra personality.
Once you reachyour desired length, tie off both ends with a secure knot so hanging becomes simple.
Display possibilities are wide open, drape it across a mantel, hang it down a doorway, wrap it around a staircase, or string it across a window for that festive entrance you're after.
Pastel Egg Cup Spring Wreath
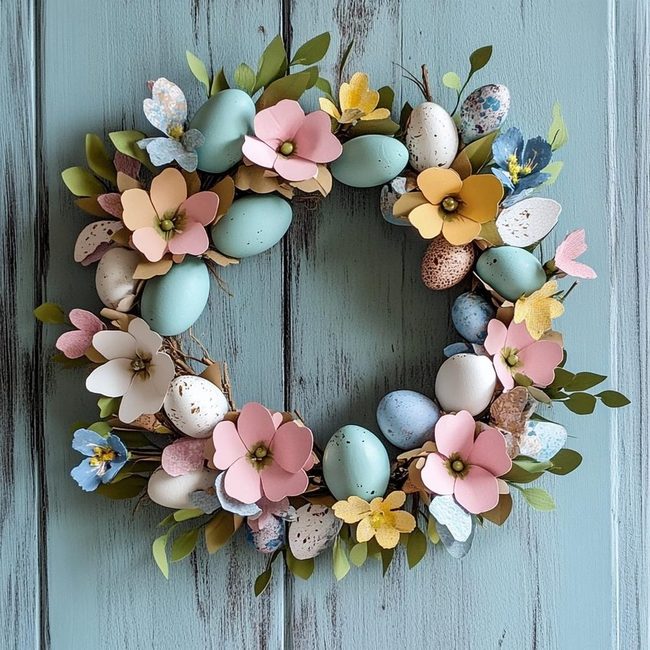
If you've got empty egg cartons sitting around from spring baking, recycle them into charming wreaths instead of tossing them away.
Start by attentively cutting the egg cups apart from the carton with scissors or a sharp knife, and keep them as intact as possible since slight imperfections add rustic, handmade appeal.
Paint across cup with acrylic craft paint in delicate pastels like pink, yellow, blue, and green for a spring feel, or choose whites, creams, and browns for a farmhouse look that works with any style.
You can apply several thin layers of paint and let across dry completely before adding the next one.
Arrange your painted egg cups onto a grapevine wreath form, cardboard ring covered in ribbon, or fabric base, experimenting with tight patterns or loose, organic designs until you find what you like.
Glue across cup securely to the base with a hot glue gun and work all the way around until everything is covered.
Now add springtime touches like faux flowers, greenery sprigs, or speckled eggs tucked between the cups or glued on top for dimension.
Finish with a ribbon bow or fabric streamers at the bottom, then hang your wreath on a door, above a mantel, or as a table centerpiece for springtime charm and whimsy.
Liam Caldwell
Lead Designer & Innovation Strategist
Expertise
User-Centered Design, Creative Problem Solving, Modern Aesthetic Integration, Technology-Driven Design Solutions, Adaptive Space Planning, Trend Analysis, Sustainable Design Solutions
Education
New York School of Interior Design
Liam Caldwell brings fresh ideas to kreativk.net by turning everyday spaces into unique, inviting areas.
Living in Philadelphia and trained at the New York School of Interior Design, he mixes basic design skills with modern technology to make rooms both stylish and useful. Liam is passionate about sustainable design and always finds creative ways to improve the spaces where we live.