
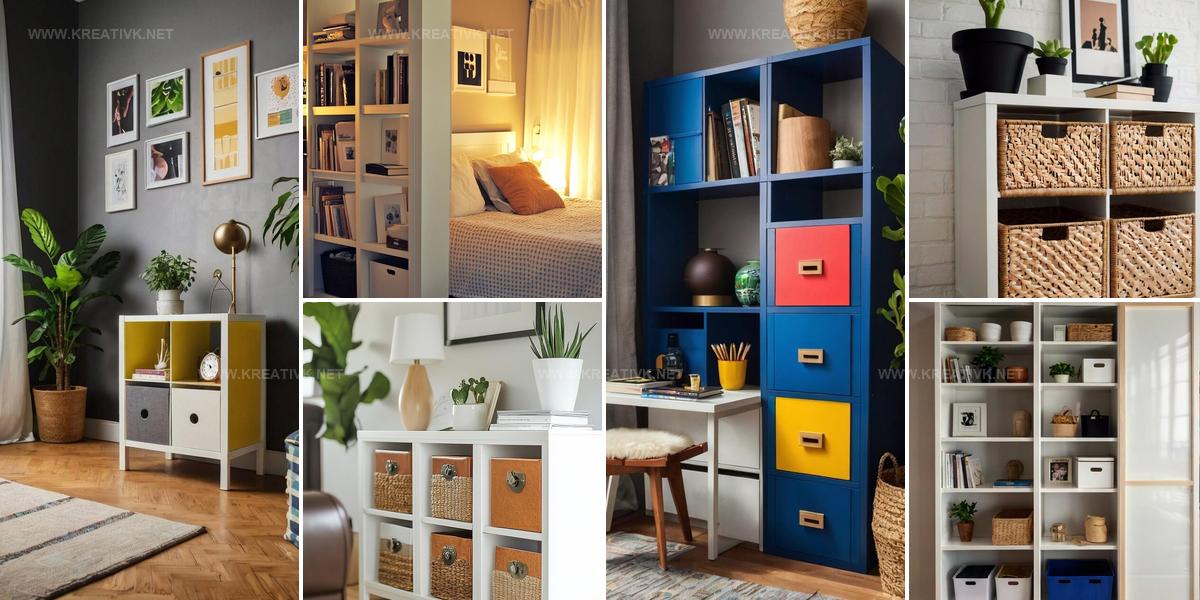
9 Elevate Your Ikea Kallax with These Simple Upgrades
Budget-friendly furniture can absolutely exude luxury when you know a few simple styling secrets, and learning how to make your ikea kallax look expensive opens up a world of sophisticated design possibilities.
The beauty of this versatile cube storage system lies in its blank canvas potential, waiting for the right touches to transform it from basic to high-end.
Many homeowners assume that achieving an upscale aesthetic requires spending thousands on designer pieces, but clever modifications and thoughtful styling prove otherwise.
With some strategic upgrades and attention to detail, the humble kallax becomes unrecognizable as an affordable piece.
The difference between ordinary and extraordinary often comes down to finishing touches rather than price tags.
What matters most is understanding which elements signal quality and refinement to the eye.
Stay with me as we walk through everything needed to give this ikea staple the luxurious makeover it deserves.
Patterned Back Panels Transform Kallax
Wallpaper or decorative panels on the back of every cube will instantly transform your Kallax into something that grabs attention and looks far more polished than the basic unit alone.
You have plenty of options here: go bold with colorful graphic patterns, or keep things understated with textures like faux linen or grasscloth that add depth without overwhelming the space.
Wood, cork, or fabric panels work beautifully too if wallpaper isn't your style, and they give you that custom, layered appearance that makes shelving feel expensive and designed.
Measuring and cutting the wallpaper or panels to fit every cube takes just a little time, and double-sided tape or adhesive spray makes the whole process simple and removable whenever you want to switch things up.
Once your backings are in place, styling the cubes with a mix of books, vases, small sculptures, and plants across every opening creates a balanced display that looks refined and put together.
Pairing these decorative backs with thoughtfully arranged items means you're layering different heights, colors, and textures throughout the unit.
Your Kallax goes from a plain storage piece to something that looks like it belongs in a design magazine, and changing it out later takes almost no effort at all.
Solid Natural Timber Top Elevates Kallax
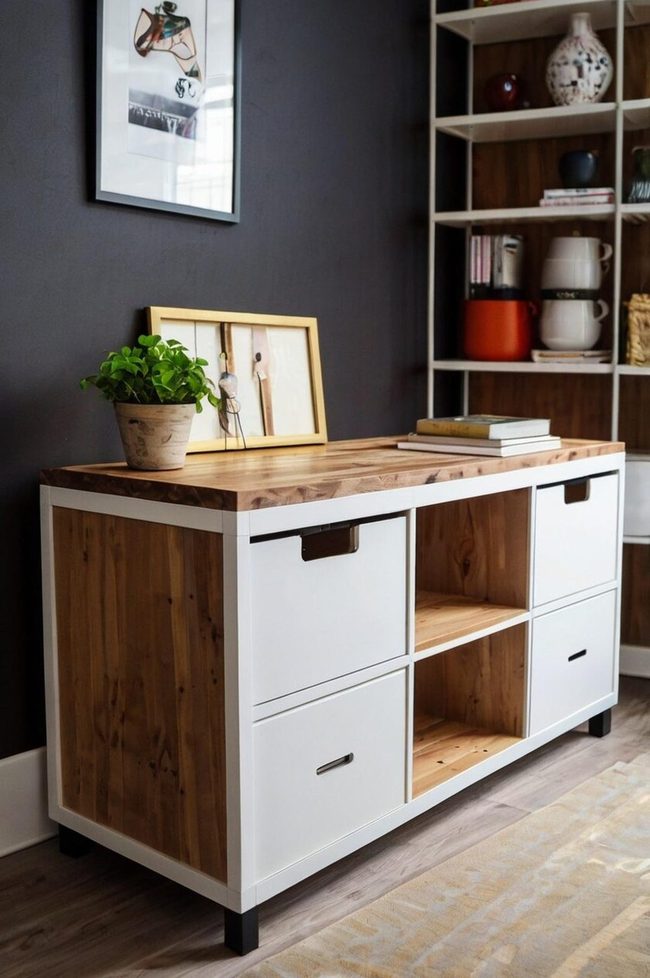
One simple way to transform your Kallax into something that looks professionally made is by adding a custom wood top, and this single upgrade makes such a difference in how the piece feels in your room.
A wooden board that sits slightly larger than your Kallax's surface creates instant sophistication by contrasting beautifully with the simple frame underneath.
You have lots of options when choosing your wood, oak and walnut give you that timeless, classic feel, while pine or birch work better if you prefer lighter, modern Scandinavian style.
After picking your wood, sand it smooth to remove any rough spots and apply stain or finish to bring out the natural beauty of the grain.
For extra durability and shine, add a polyurethane coat on top.
Once it's ready, you can attach it with adhesive strips, brackets, or simply rest it in place if you want to keep things flexible.
Your Kallax suddenly feels like a custom-built furniture piece rather than a budget shelving unit, and it gains warmth and character that makes the whole room better.
Beyond looking great, this upgrade also makes the unit far more useful as a console table, TV stand, or kitchen island.
Open Shelving Space Divider
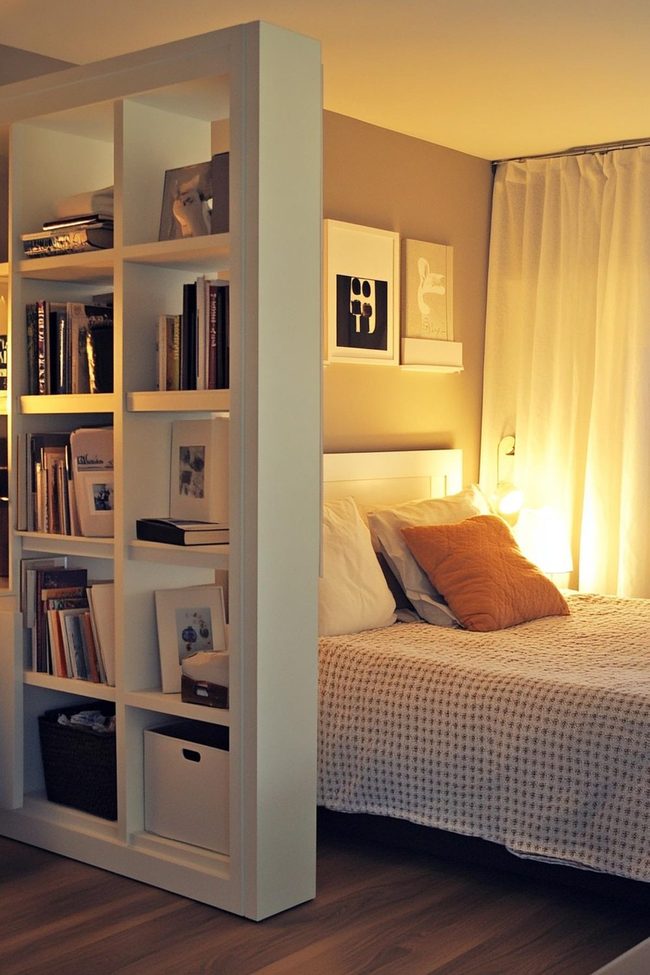
When you need to split up an open floor plan or set up separate zones in a compact apartment, the Kallax shelf unit works beautifully as a room divider that looks far more refined than standard partitions.
Mix decorative pieces like books, vases, and candles in some cubes while keeping others empty to add visual interest and prevent a cluttered appearance.
Slip baskets or storage containers into several sections to tuck away unsightly items such as cables and random clutter that you'd rather hide.
Paint the Kallax or apply contact paper to match your existing decor and help it blend in rather than stand out as a separate piece.
Hanging lightweight curtains or fabric panels from the top edge alters it into a semi-private screen that feels both functional and stylish.
Plants with trailing leaves like pothos and ivy add greenery and organic texture that makes the divider feel less utilitarian and more like part of your design.
The layout works as both a built for regular use space separator and a display surface that elevates your room's overall look and feel.
Adhesive Vinyl Reshapes Kallax Instantly
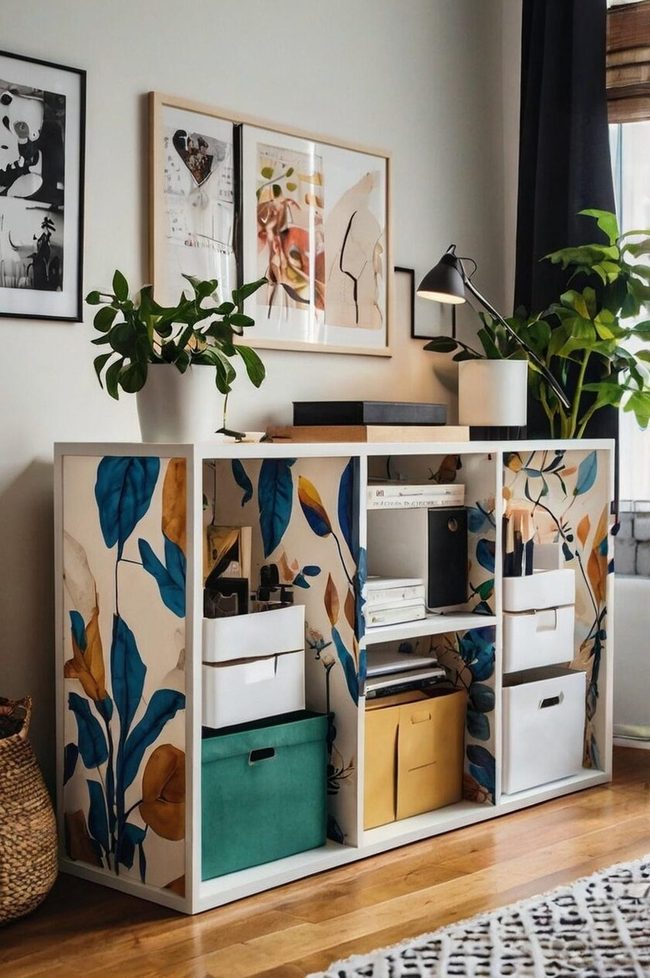
Faux marble or rich wood grain finishes applied through contact paper or adhesive vinyl can give your Kallax a luxury appearance that rivals high-end furniture, and these materials come in countless patterns including concrete and metallic options that let you completely refresh the unit's look without any permanent commitment.
Renters and decorators who like switching things up frequently find composition ideal since you can remove it whenever you want without damage or hassle.
Start by wiping down your Kallax thoroughly so the adhesive bonds properly to the surface.
Measure out throughout section you plan to cover and cut the contact paper to match those dimensions precisely.
Peel back just a small portion of the backing to line everything up, then slowly work the material onto the surface as you gradually remove the rest of the protective layer beneath.
A credit card or squeegee helps you push out air bubbles and smooth everything flat for clean, polished results.
You can go bold and wrap the whole unit or keep it minimal by covering only certain spots like the top and sides for a two-tone style that suits your space.
Since contact paper costs very little, applies easily, and peels away just as simply, you get that custom, high-end transformation without spending much money at all.
Emerald Green Kallax Shelf Unit
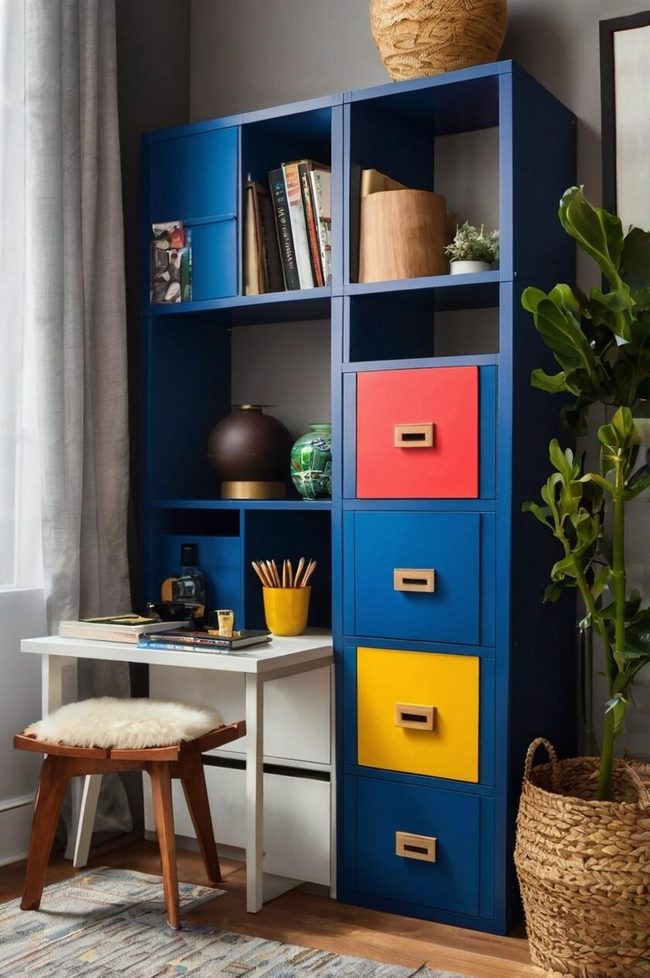
Painting your Kallax in a bold color is one of the quickest ways to completely refresh how it looks in your space.
If yours still has that standard white or black-brown finish, consider swapping it for something that makes a real statement and matches your room's style.
Deep jewel tones like emerald green or navy blue give the piece a luxurious feel, while softer shades like blush pink or sage green bring a more refined quality to the room.
Before you start painting, sanding and priming matter a lot since they help the paint stick properly and dry smooth and even.
Use a good paintbrush or roller on the larger flat areas and switch to a smaller brush for corners and edges where space is tight.
You could want to apply two coats, letting eachone dry all the way through before adding the next layer.
Once you're done, you can add a glossy topcoat for a shiny finish or leave it matte for a more modern appearance.
This project is straightforward enough for a weekend afternoon and doesn't demand special skills or expensive equipment, plus you end up with furniture that feels entirely your own.
Brass Knobs Transform Plain Shelving
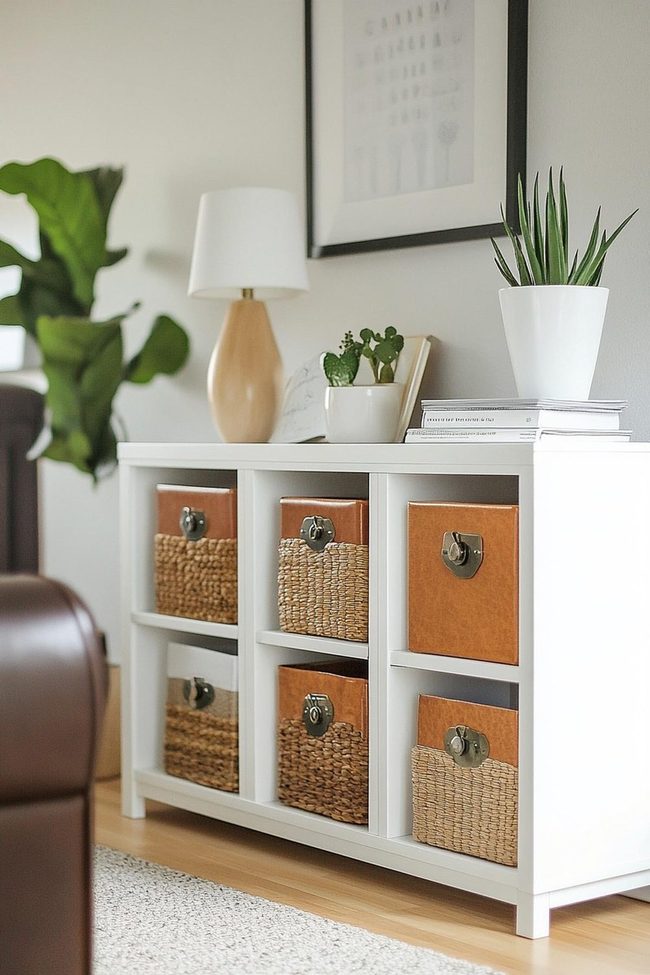
Adding stylish hardware to your Kallax shelving unit is one of the easiest ways to transform it into something that looks custom-made and far more sophisticated than its basic origins.
Brass knobs, matte black handles, glass or ceramic pieces with ornate patterns, the options let you match whatever style you're going for, whether that's modern, vintage, or something in between.
You can hunt for affordable pieces online or browse thrift stores if you want to save money and find unique options.
Installing them takes just a drill, screwdriver, and some care to measure and align throughout knob before you drill any holes.
Once everything is attached, your shelving unit feels less like a flat-pack purchase and more like a piece you designed yourself.
This upgrade looks especially polished if you've added doors or drawers to your Kallax, since the hardware gives those sections a finished, high-end quality that really stands out.
Black Sliding Door Storage
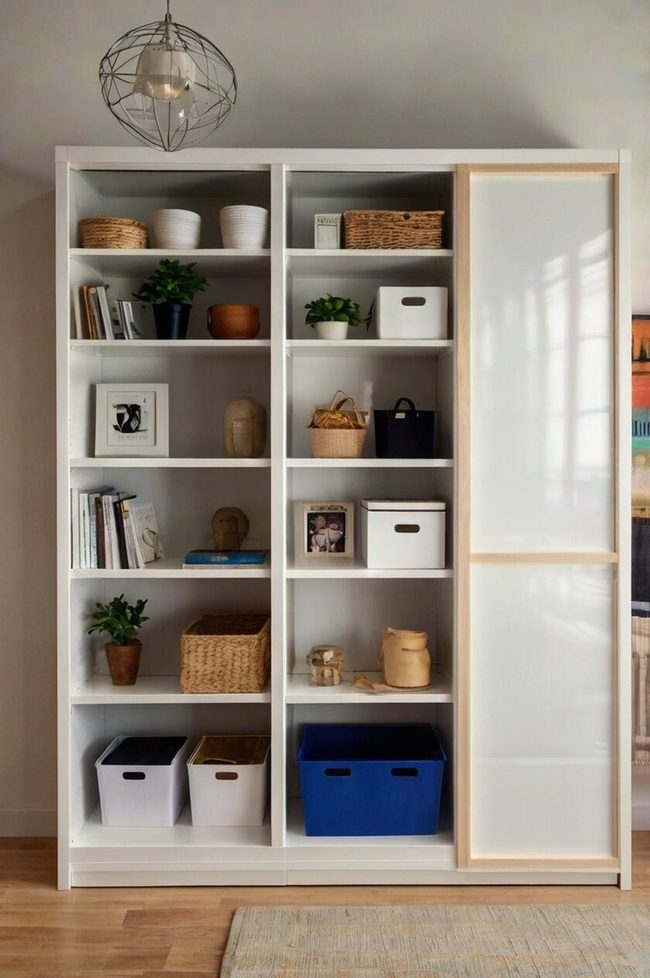
Sliding doors transform your Kallax into a modern storage solution that looks far more polished and expensive than it actually is.
You can buy ready-made kits designed for the Kallax, or build your own doors using thin panels and sliding hardware to save money.
Installing them requires mounting a rail to the top of your unit and attaching rollers to the panels so they glide smoothly back and forth.
Paint or stain the panels to match your room, or add texture with fabric, cane webbing, or rattan if you want a relaxed, boho vibe.
Beyond the pared-back appearance, sliding doors give you hidden storage space that keeps clutter out of sight and maintains a clean look.
This upgrade works wonderfully in living rooms or anywhere you want your Kallax to serve double duty as both storage and decoration.It's one of those upgrades that makes a real difference in how polished your space looks overall.
Wooden Legs Elevate Kallax Storage
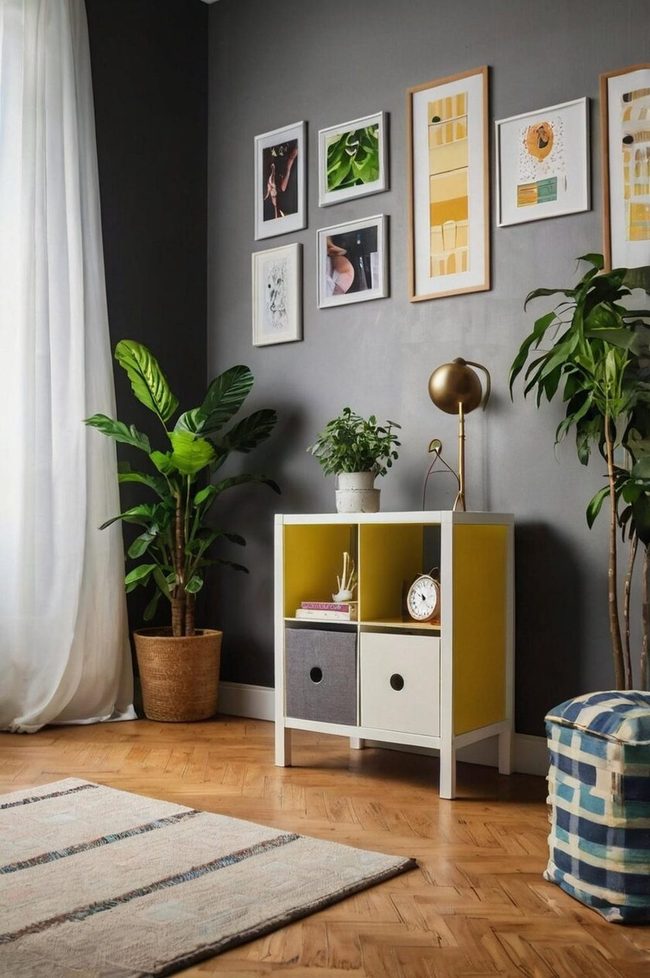
Lifting your Kallax off the ground with furniture legs instantly refines it from a basic storage unit into something that looks custom-made and far more sophisticated than its price tag suggests.
You can find affordable options online or at hardware stores, and right now wooden legs with tapered mid-century designs are everywhere, though metal legs work beautifully too if you prefer an industrial vibe.
Installation is straightforward: flip the unit upside down, mark your mounting points, attach the plates with a drill, screw in the legs, and flip it back over.
Beyond the obvious style upgrade, this simple addition actually makes your room feel larger because the open space underneath creates visual breathing room, which is especially helpful when you're working with a small apartment or tight bedroom.
Your shelving unit no longer reads as budget-friendly furniture but rather as a thoughtfully designed storage solution that could easily belong in a higher-end home.
Even a few inches of clearance makes a noticeable difference in how polished your space feels overall.
Woven Cane Shelf Door Upgrade
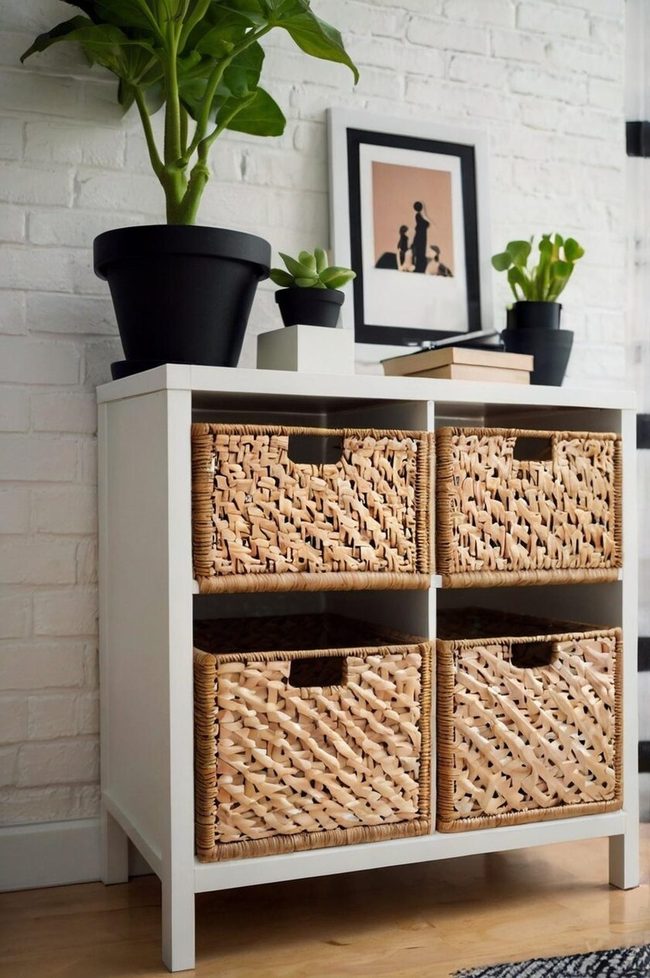
Cane webbing brings instant texture and warmth to any Kallax unit, and it's become a popular choice for shelving makeovers.
You can work with it easily whether your Kallax has doors or open cubes.
If you have doors, simply remove them, cut the cane webbing to size, and staple it to the inner edges for a polished finish.
For open shelving, cut pieces slightly larger than throughout opening and secure them with small nails or adhesive strips to add depth and visual interest.
Natural wood tones and earthy decor pieces pair beautifully alongside the woven texture for a balanced look.
Since cane webbing is lightweight and straightforward to install, it works well as a DIY project even if you've never done this before.
You could need just a few basic tools, scissors or a utility knife, a staple gun, and maybe some nails or adhesive strips.
The result feels both warm and stylish without looking overdone.
Liam Caldwell
Lead Designer & Innovation Strategist
Expertise
User-Centered Design, Creative Problem Solving, Modern Aesthetic Integration, Technology-Driven Design Solutions, Adaptive Space Planning, Trend Analysis, Sustainable Design Solutions
Education
New York School of Interior Design
Liam Caldwell brings fresh ideas to kreativk.net by turning everyday spaces into unique, inviting areas.
Living in Philadelphia and trained at the New York School of Interior Design, he mixes basic design skills with modern technology to make rooms both stylish and useful. Liam is passionate about sustainable design and always finds creative ways to improve the spaces where we live.